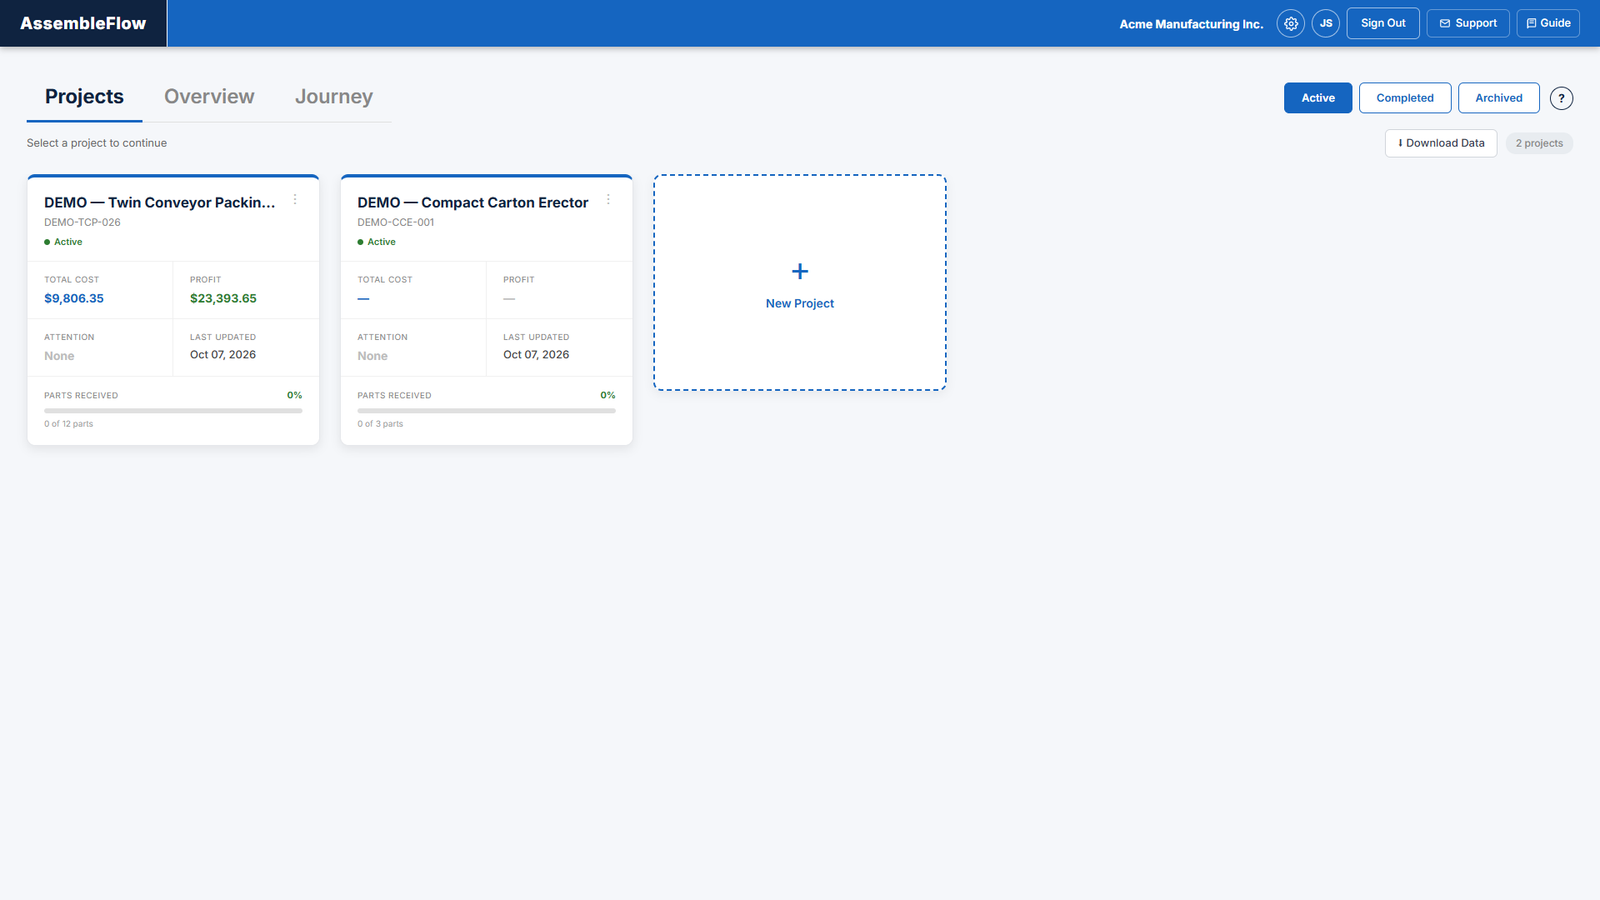
Screen 1: Projects. Every build at a glance
The Projects screen is where you land after signing in. Each machine build is a card showing its total cost, profit, how many items need attention, when it was last updated and how many of its parts have been received. Switch between Active, Completed and Archived projects, or change the view to Overview or Journey at the top.
- Total cost and profit worked out for every project
- Attention count flags urgent or overdue parts
- Progress bar of parts received against parts in the BOM
- Cost and profit are shown to owners and admins only
Screen 2: Overview. Compare every project in one table
Overview shows the same projects as a comparison table: Journey stage, expected finish and risk, order received and FAT dates, days to FAT, parts received, attention count, sales price, total cost and profit. Warning colors come from the dates and progress, not from a priority someone has to set by hand. Below the table, an organization activity list shows recent changes across all projects.
- Journey stage, expected finish and risk for every job
- Days to FAT counts down to the factory acceptance test
- See progress and profit for all jobs side by side

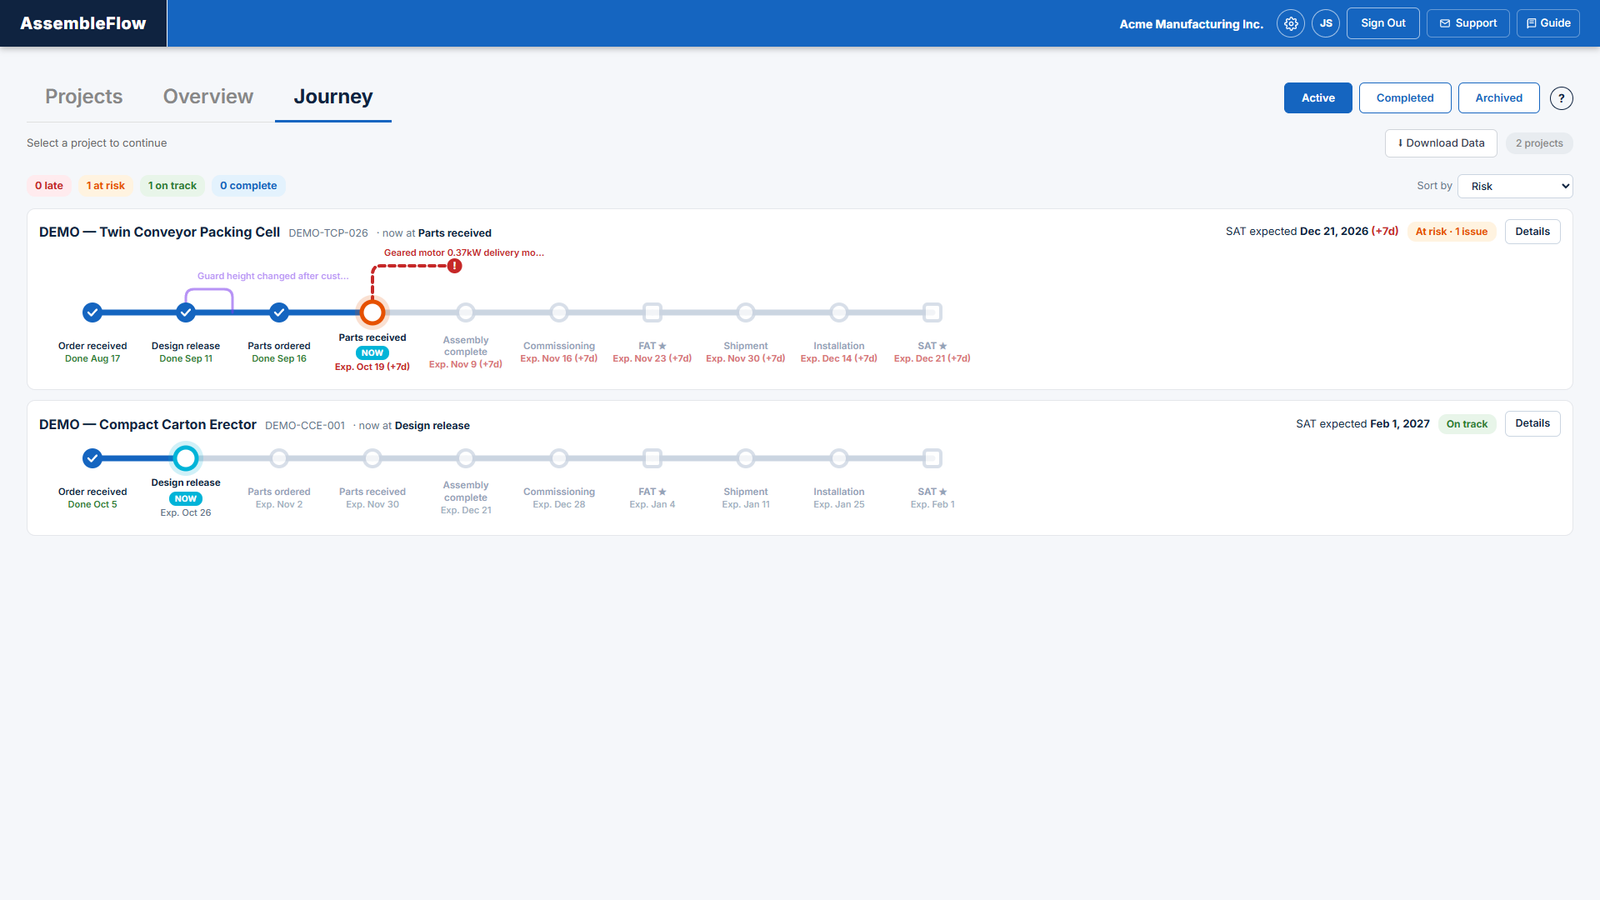
Screen 3: Journey. Every project as a route, one below the other
Journey shows each project as a metro line. Milestones are the stops: reached ones are solid, the current one is highlighted and upcoming ones are faded. Problems such as a design revision or a late supplier branch off the line until they are solved, and their delay is carried forward to FAT and SAT. Open a project with Details to edit its route, issues and actions.
- Current milestone, expected finish and risk for every project
- Open issues drawn as side branches from the route
- Delays carried forward to FAT and SAT automatically
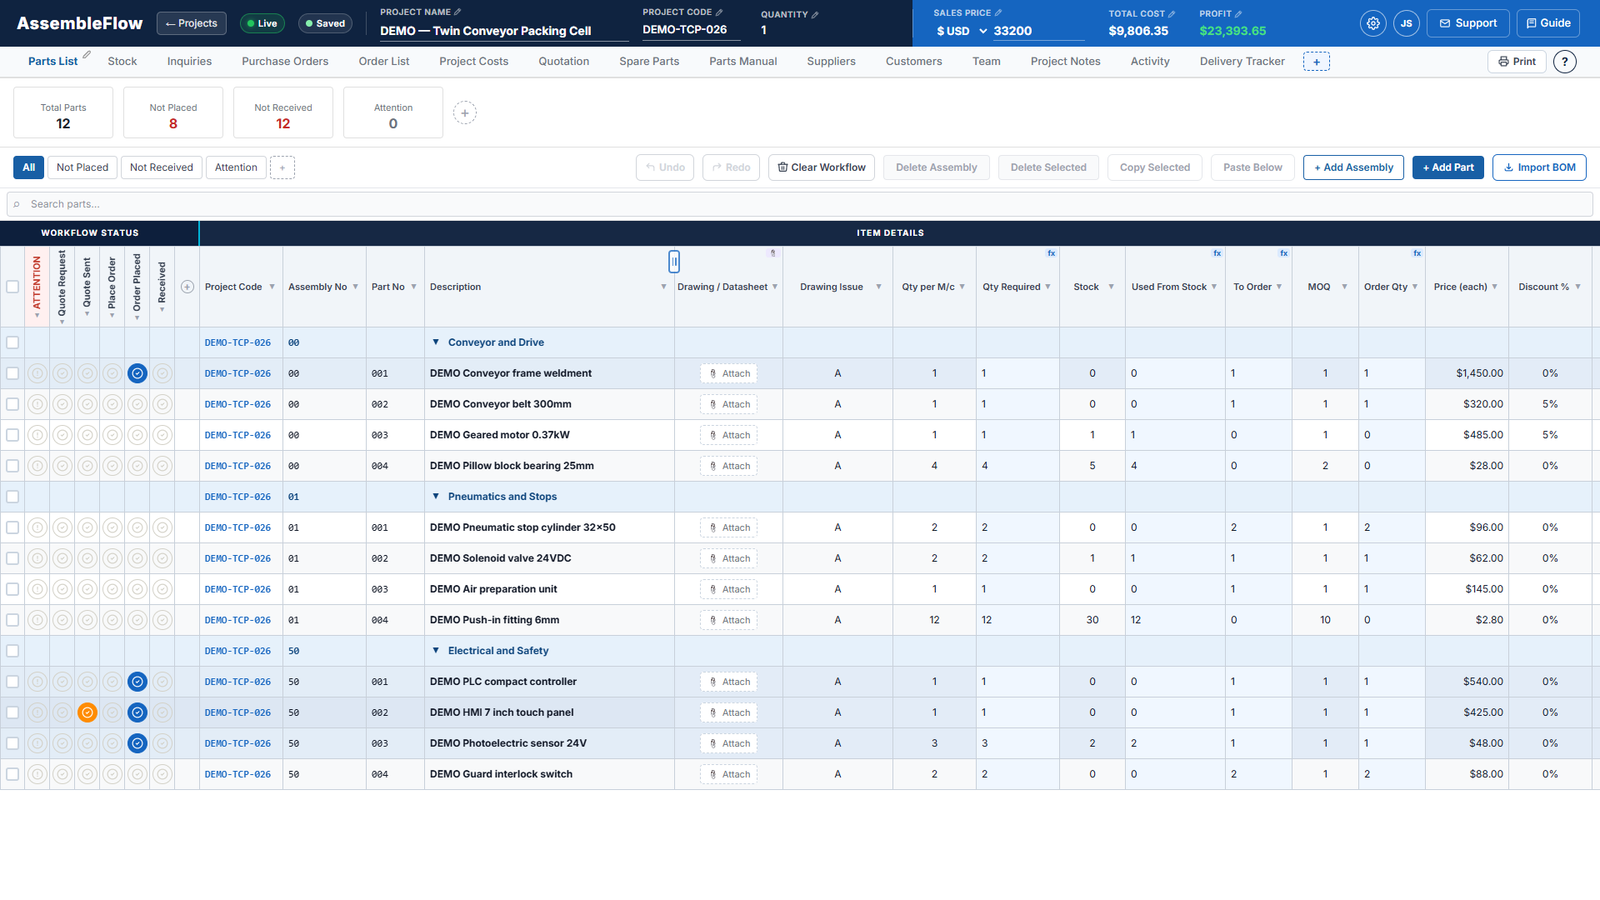
Screen 4: Parts list. One parts list per machine
The heart of every project. Parts are grouped into numbered assemblies, and the workflow columns on the left (Attention, Quote Request, Quote Sent, Place Order, Order Placed and Received) track each bought-in part from first inquiry to goods received. Quantities, net price and total price are calculated for you.
- Import a BOM from CSV, XLSX or XLSM
- Attach drawings and datasheets to each part
- Filter and search, add custom columns and formulas
- Tick a part through each workflow stage as it moves
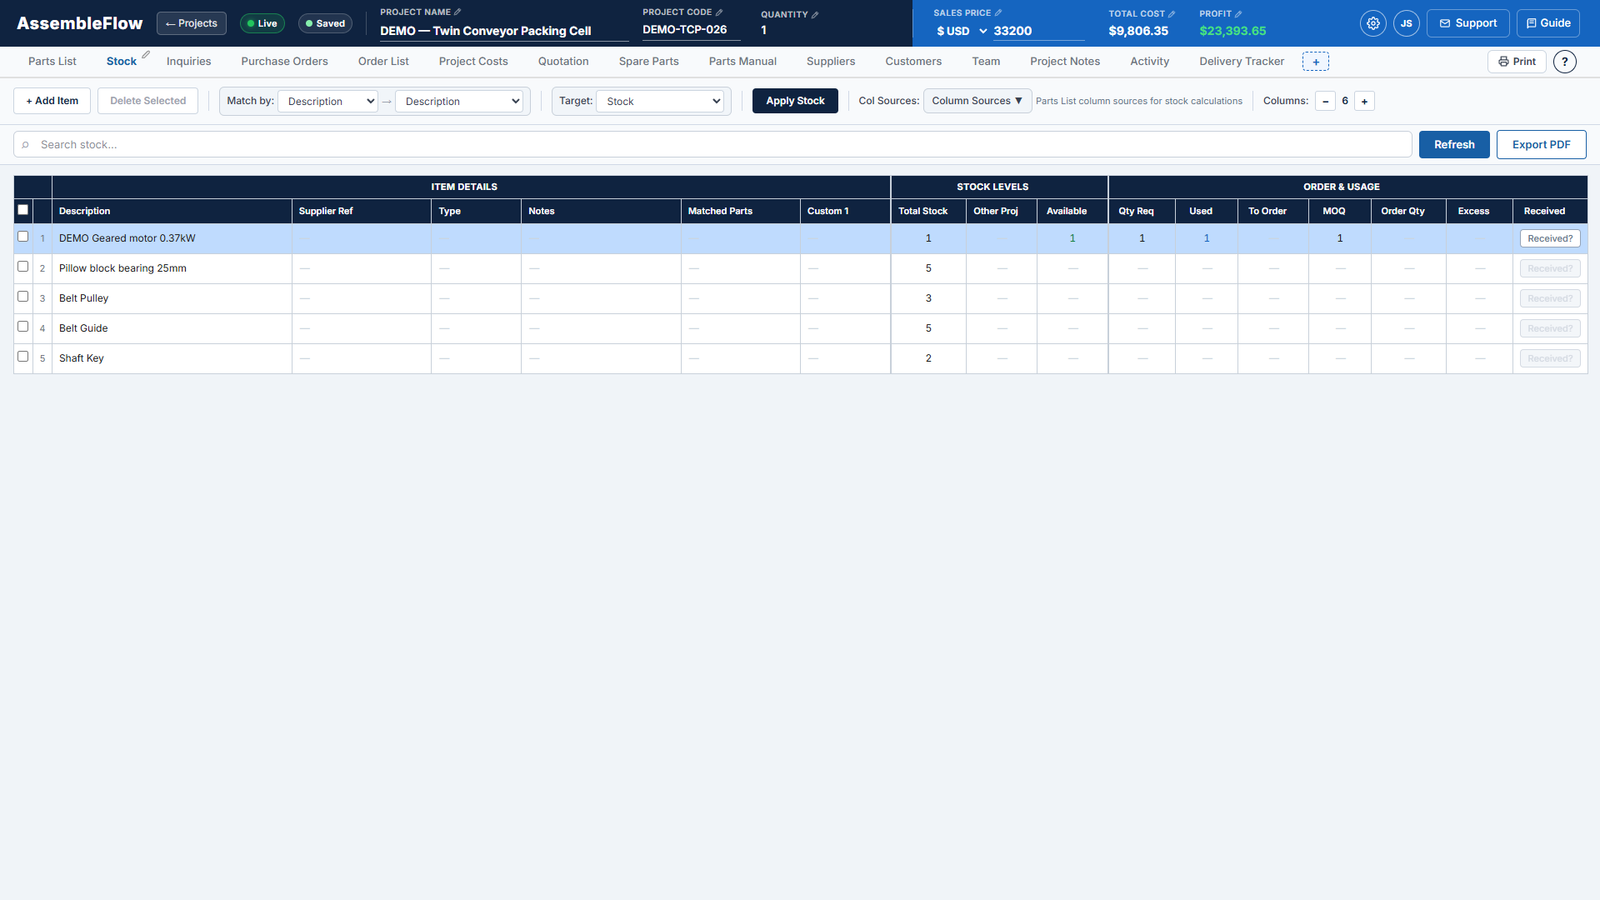
Screen 5: Stock. Use what you already have
A stock register shared by the whole organization. Match stock items to the parts list by description or part number, then apply the stock so the parts list shows how much you can take from the shelf and how much you still need to order. Stock reserved by other projects is taken into account.
- Total stock, available, used and to-order quantities
- Stock reserved by other projects reduces what is available
- Confirm receipt of each item
- Changes are shared with everyone in the organization
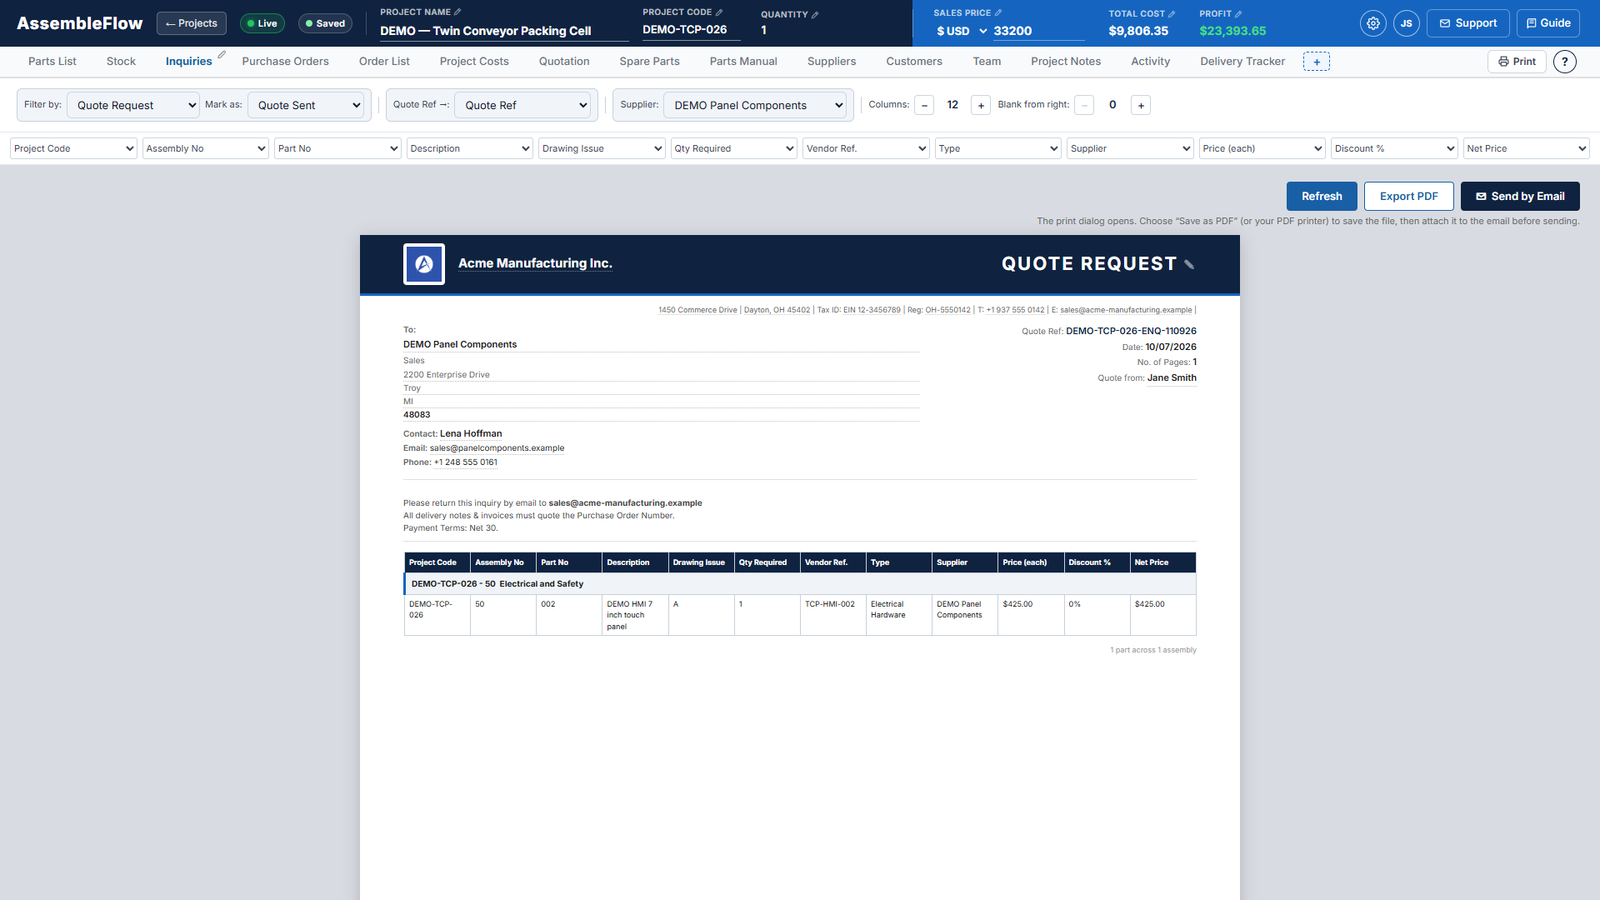
Screen 6: Inquiries. Quote requests that fill themselves in
Choose a supplier and AssembleFlow builds the quote request from the parts flagged Quote Request: part numbers, descriptions, quantities, drawing issue and your company details. When you export it as a PDF or send it by email, the parts are marked Quote Sent in the parts list.
- Supplier address and contact filled in from your supplier list
- Quote reference numbers generated automatically
- Choose which columns appear on the document
- Export PDF or send by email
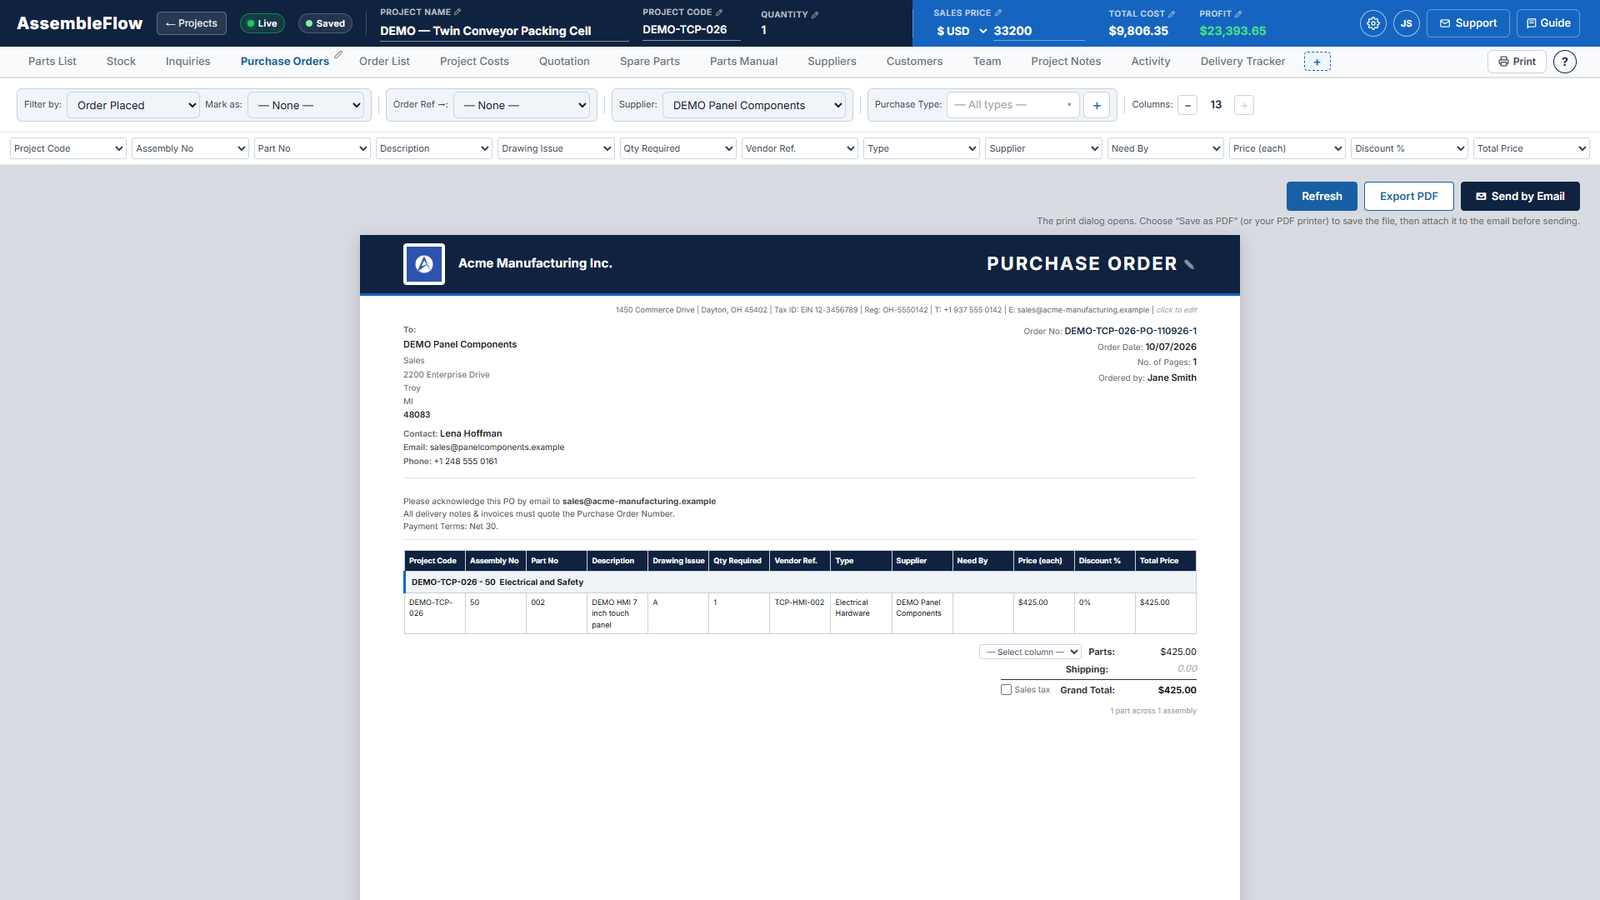
Screen 7: Purchase orders. Purchase orders in a few clicks
Raise a purchase order from the parts marked Place Order. Pick the supplier and, if you use them, a purchase type. The document shows quantities, prices, discounts, totals, shipping and optional sales tax. Exporting it marks the parts Order Placed and records the order in the Order List.
- Order quantities worked out against your stock
- Carriage and optional sales tax on the total
- Purchase order numbers generated automatically
- Export PDF or send by email to the supplier
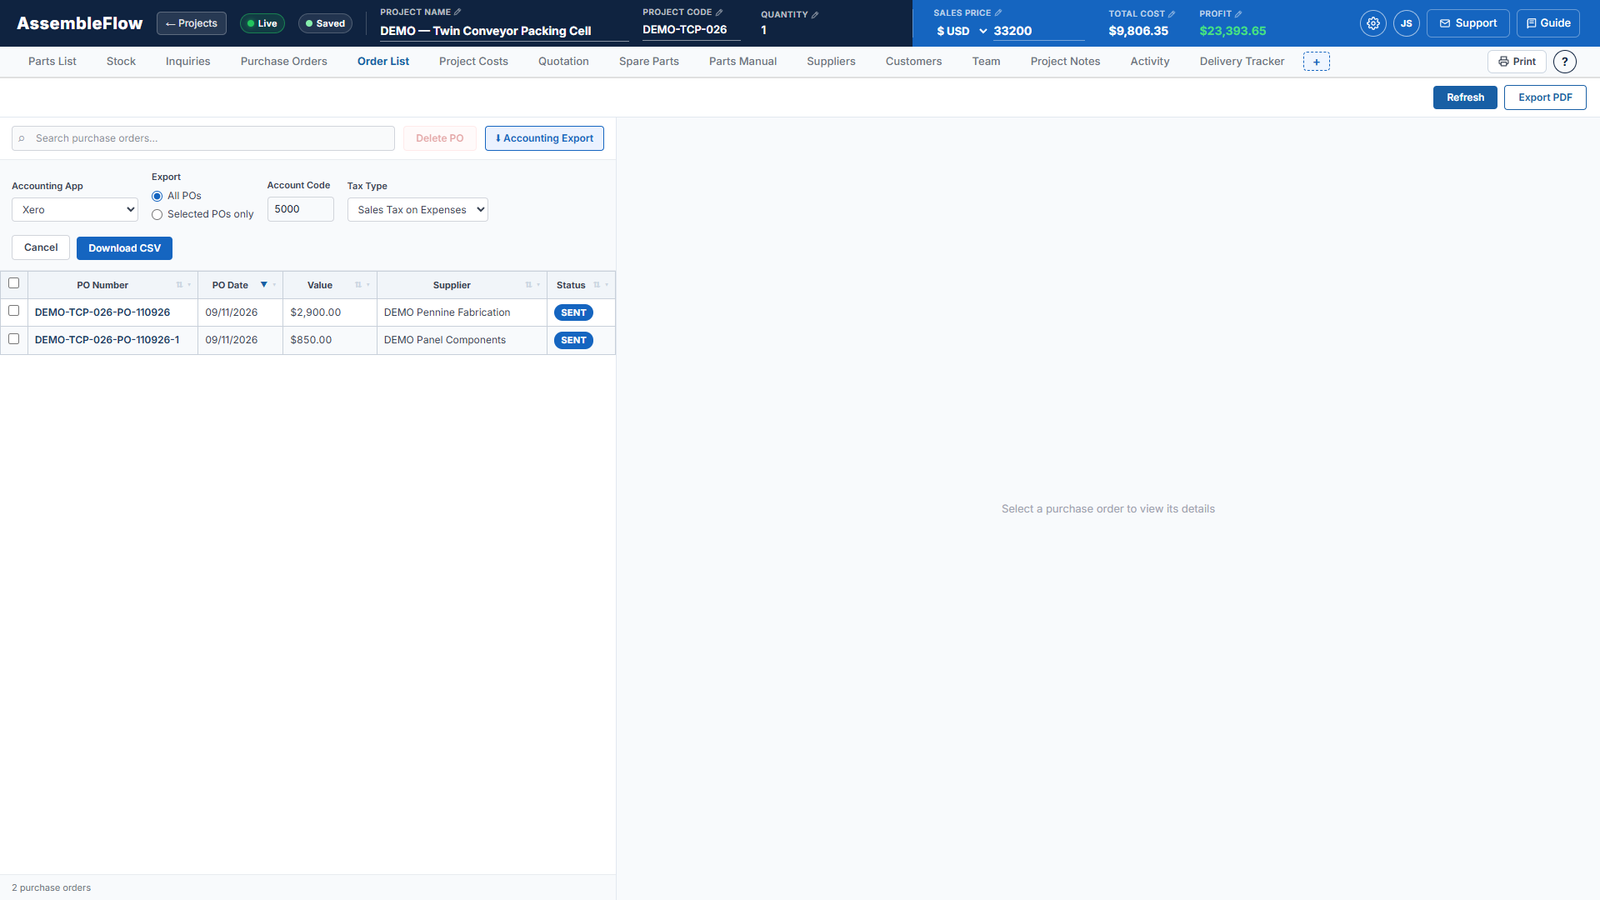
Screen 8: Order list. Every order, and export to accounting
The Order List records each purchase order you have issued, with its date, value, supplier and status. Select one to see its parts. Accounting Export downloads your orders as a CSV for your bookkeeping, with a currency code and a tax type that match the project.
- Search and sort your purchase orders
- Export for Xero, QuickBooks, Sage, FreeAgent or generic CSV
- Export all orders or only the ones you tick
- Remove a record created by mistake
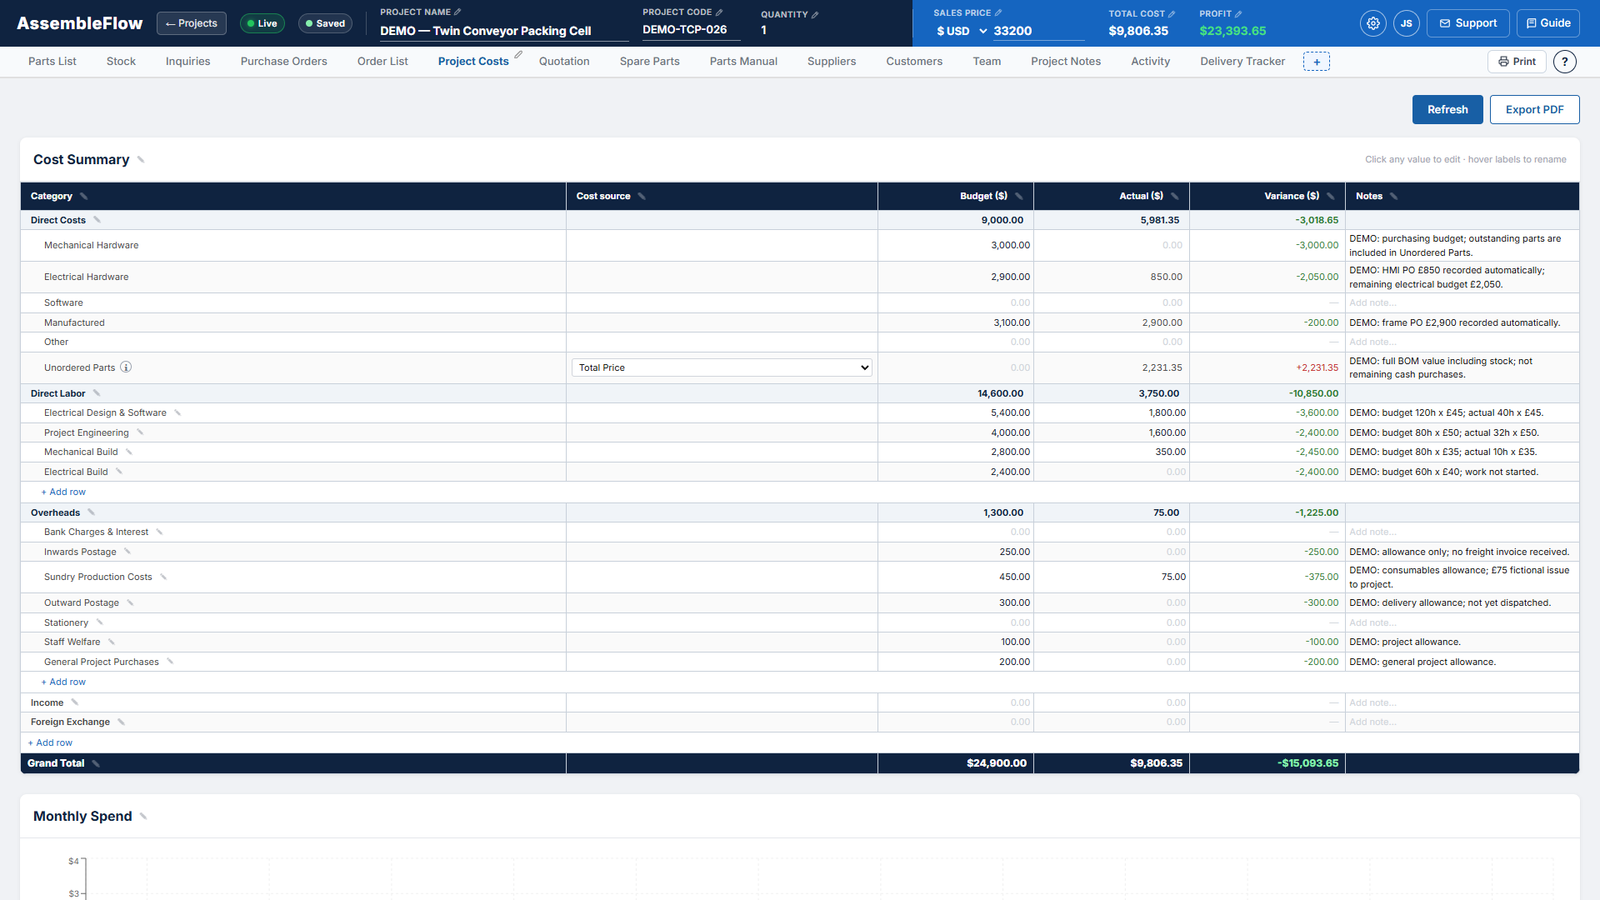
Screen 9: Project costs. Know what the build really costs
Compare budget with actual cost for the whole project. Actual figures build up from your purchase orders and from priced parts you have not ordered yet; you add labor, overheads and anything else as extra lines. The grand total is the Total Cost shown in the project header, and the profit is worked out against your sales price.
- Budget, actual and variance for every line
- Labor, overheads and extra cost lines
- Parts not yet ordered are included in the total
- Profit updates as costs change
Screen 10: Quotation. A customer quotation from your costs
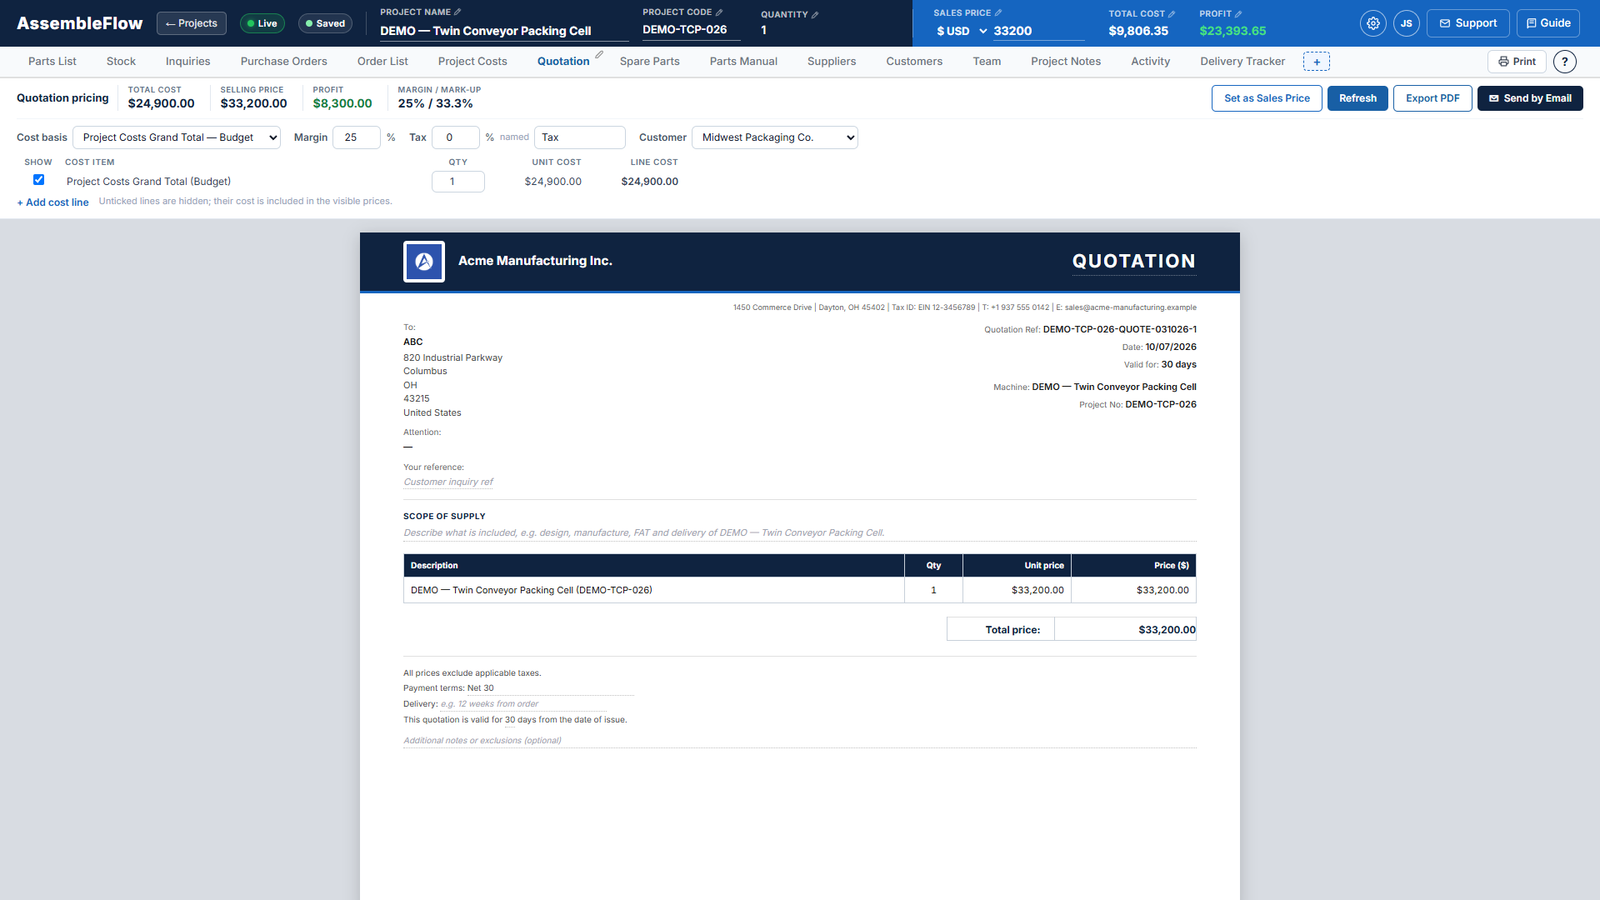
Turn your project costs into a quotation for the customer. Choose the cost basis (actual, budget or your own figures), set a margin and AssembleFlow works out the selling price. The customer's document shows only the lines you tick, with the cost of any hidden line spread across the rest. Your costs and margin never appear on it.
- Margin applied as a share of the selling price
- Quotation numbers generated automatically
- Set the quoted price as the project's sales price
- Export PDF or send by email
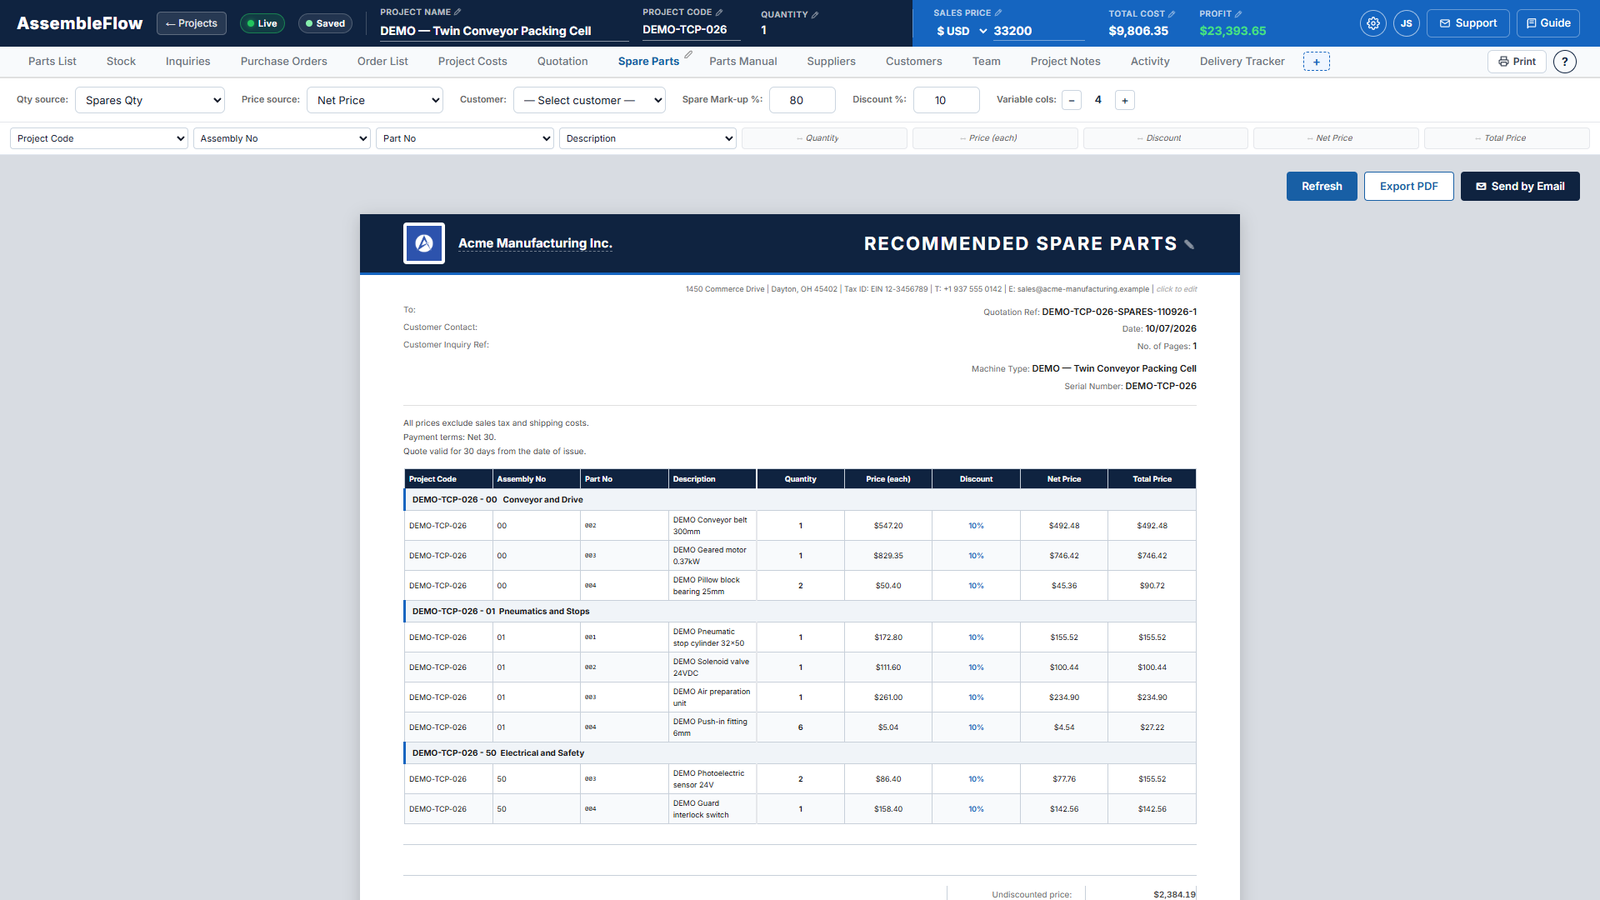
Screen 11: Spare parts. Quote spare parts to the customer
Build a priced spare-parts quotation from the parts you select. Set a mark-up and a discount (80% and 10% to start with), choose the customer, and the document shows each part's price, net price and total, with the whole-quote totals underneath.
- Choose which quantity and price columns to use
- Mark-up and discount applied to every line
- Customer chosen from your customer list
- Export PDF or send by email
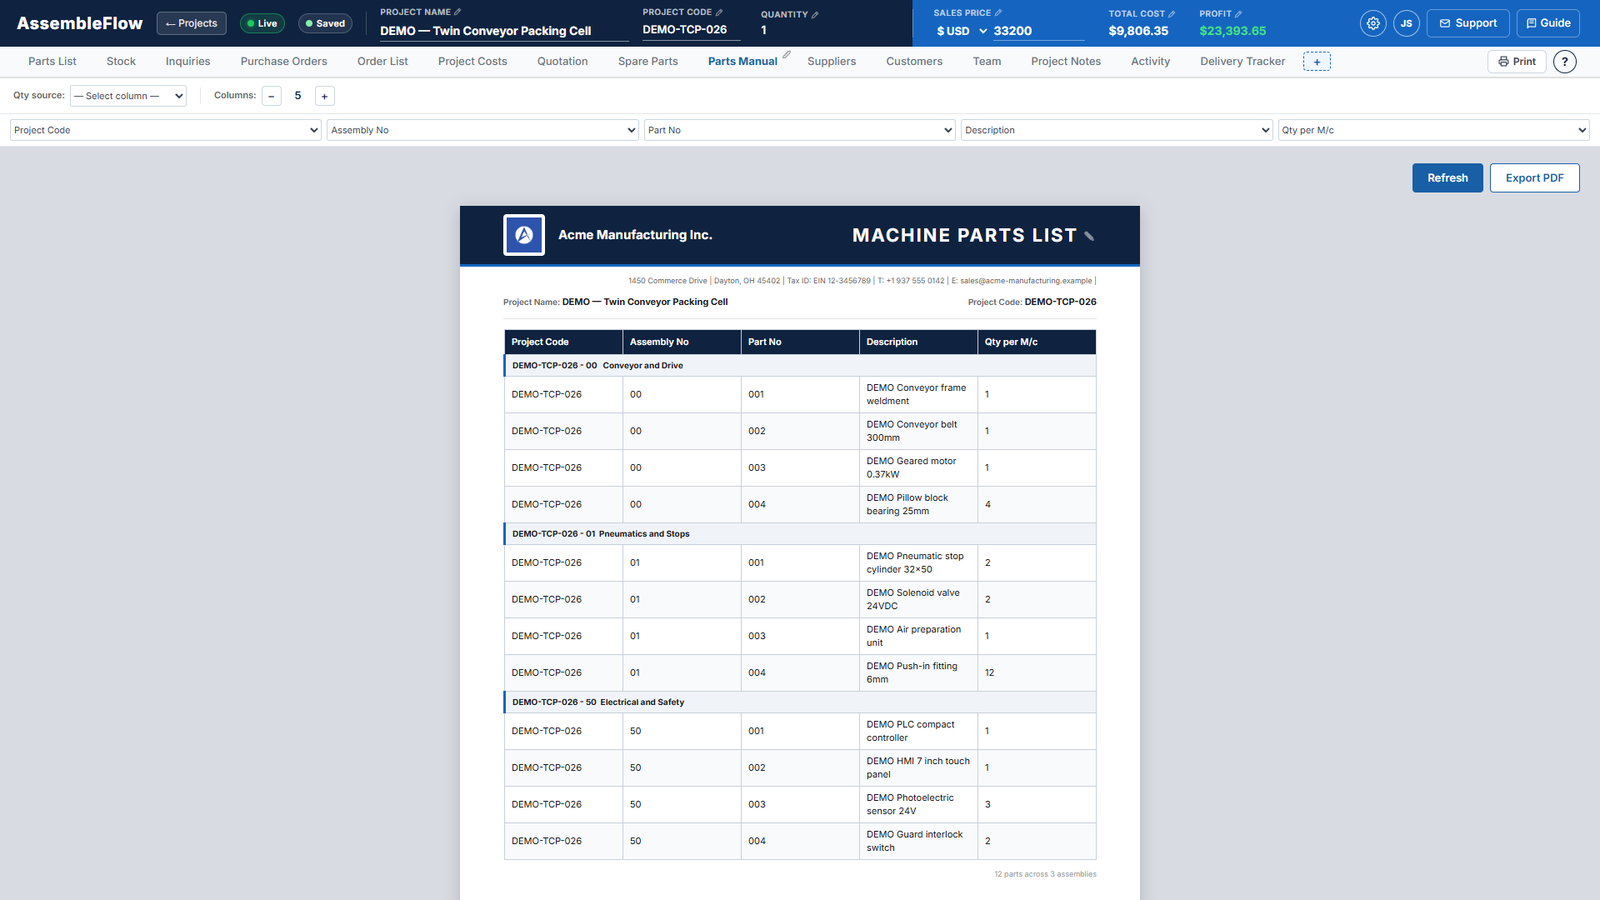
Screen 12: Parts manual. A parts list for the machine manual
Prepare the parts list that goes into the customer's manual. It is a compact Letter-size document grouped by assembly. Choose which columns to show, such as part number, description and quantity per machine, then export it as a PDF to go with the handover documents.
- Grouped by assembly, with your company heading
- Pick the quantity source and the columns shown
- Machine name and project code filled in for you
- Export PDF
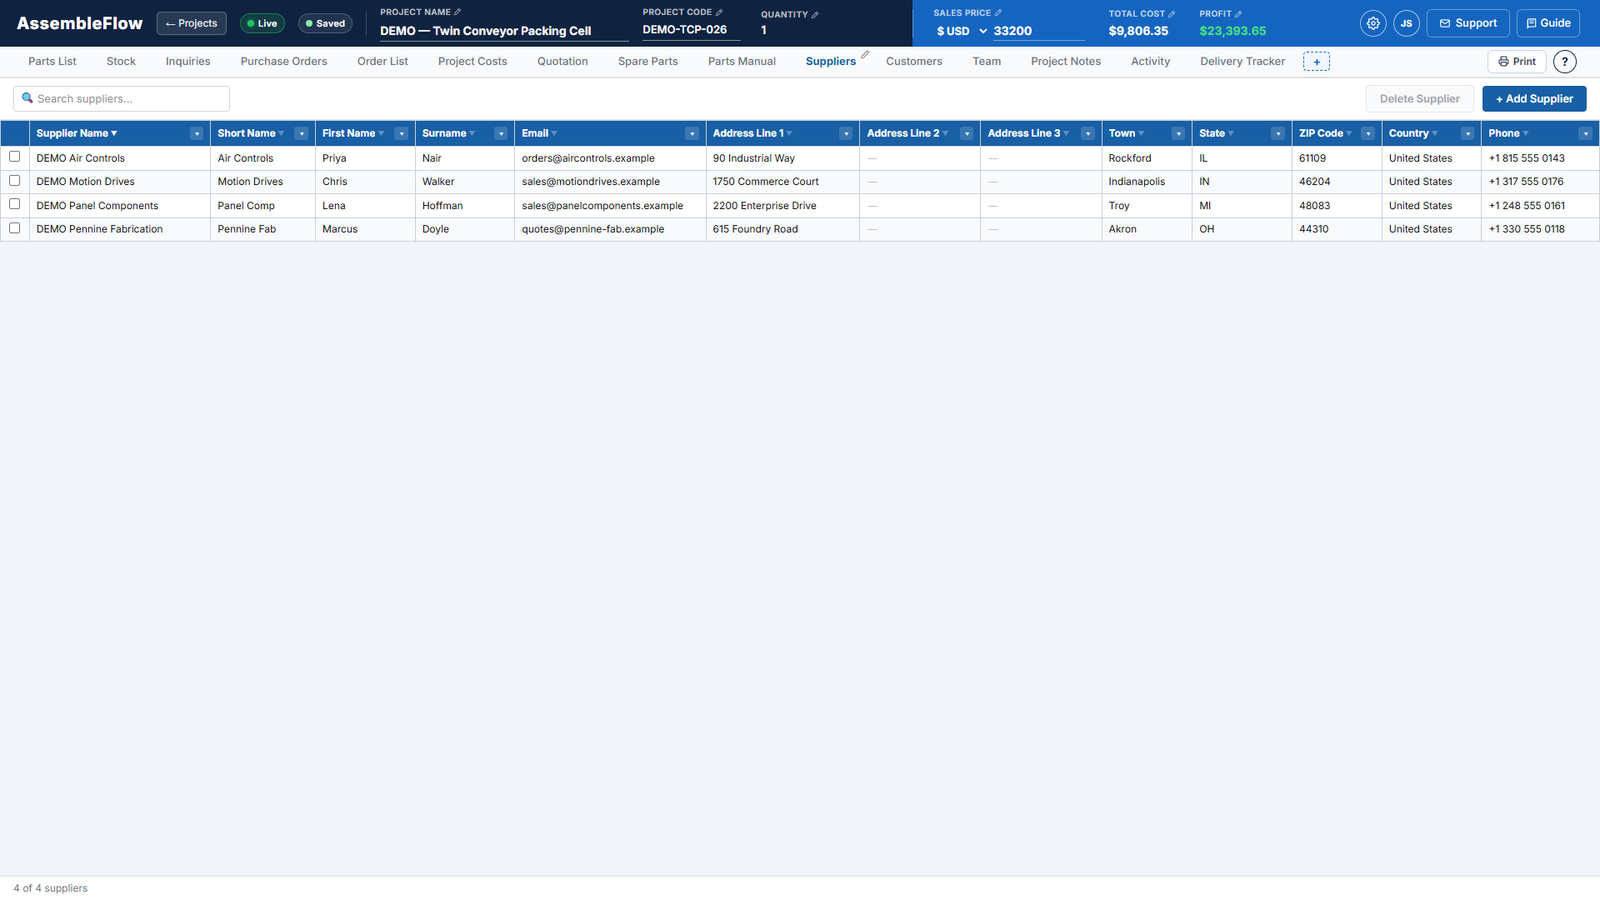
Screen 13: Suppliers. Your supplier database
Keep every supplier's name, contact, email, address and phone in one place. The list is shared by all your projects and fills in the recipient details on inquiries and purchase orders, and the supplier name on the accounting export.
- Add, edit and delete suppliers
- Search and sort the list
- Used on inquiries, purchase orders and exports
- Shared by everyone in the organization
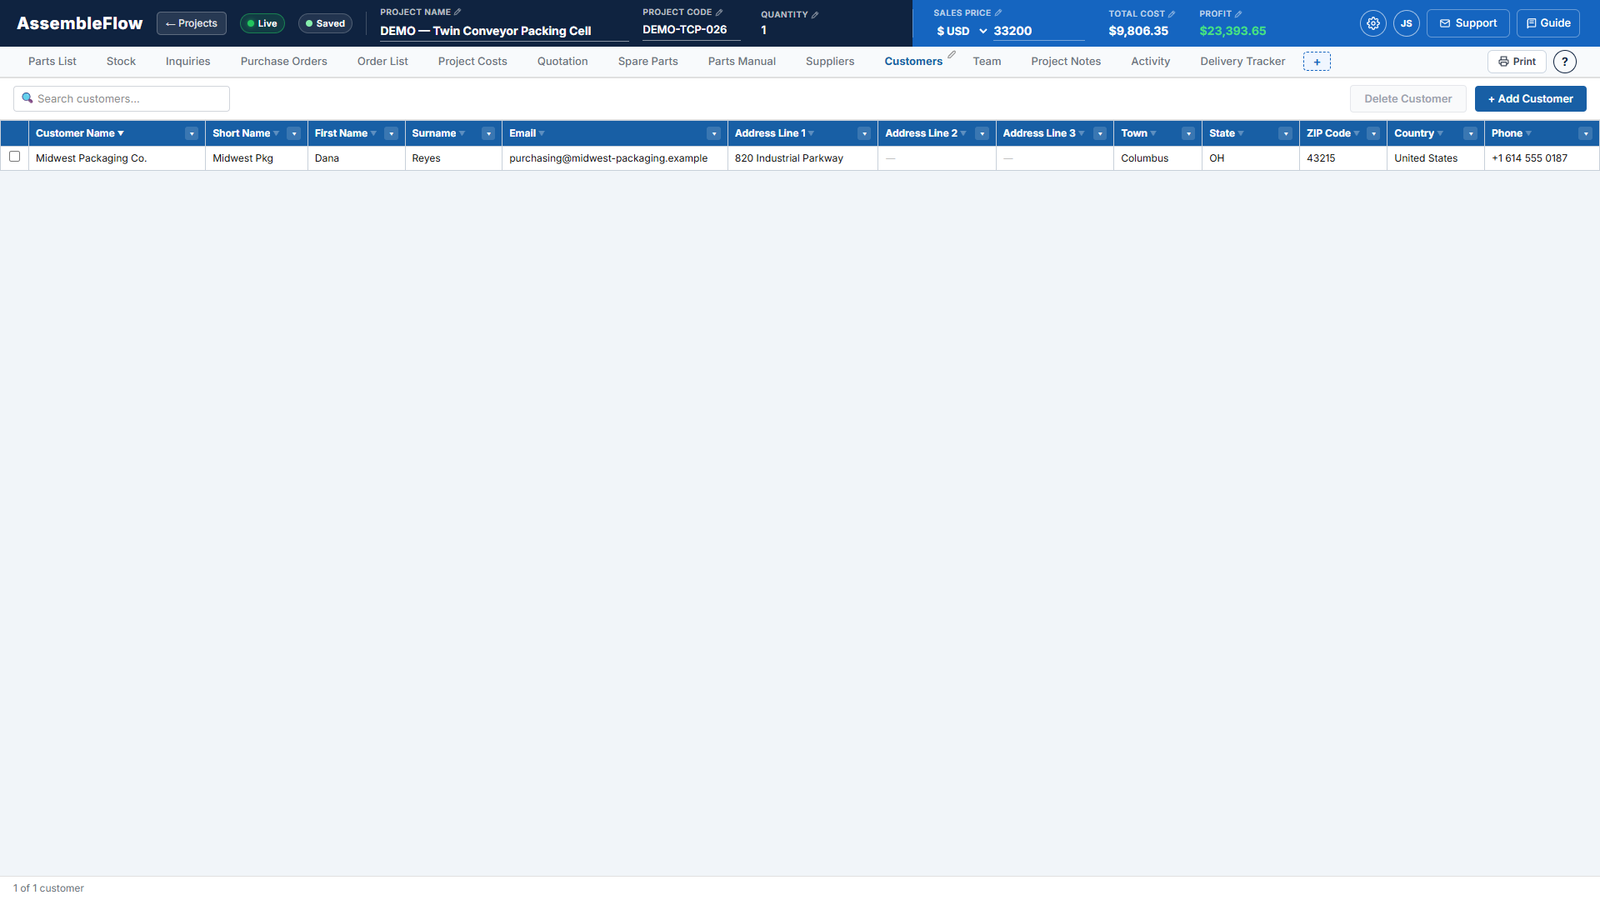
Screen 14: Customers. Your customer database
Keep your customers' names, contacts and addresses in one list. Choose a customer on a quotation or a spare-parts quotation and their details fill in on the document.
- Add, edit and delete customers
- Search and sort the list
- Used on quotations and spare-parts quotations
- Shared by everyone in the organization
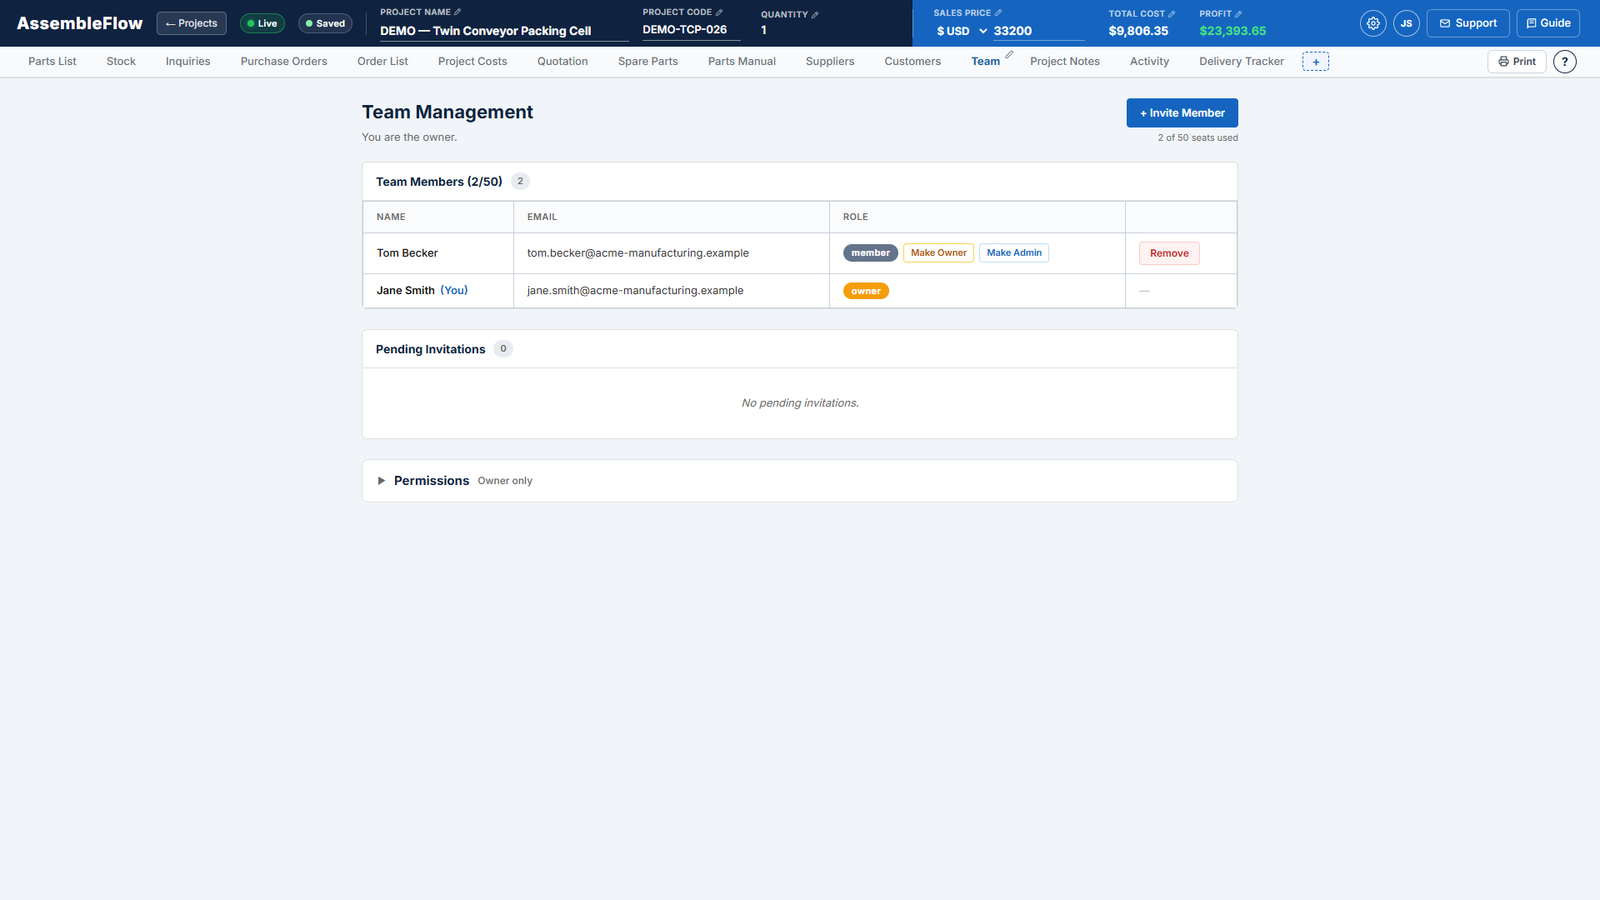
Screen 15: Team. Invite your team and set their access
Invite colleagues by email and give each a role: owner, admin or member. Owners and admins manage the team. The seat count shows how many of your plan's seats are in use, and the owner can control which tabs each member may open or edit.
- Roles: owner, admin and member
- Pending invitations counted against your seats
- Owner sets permissions for each tab
- Change a role or remove someone at any time
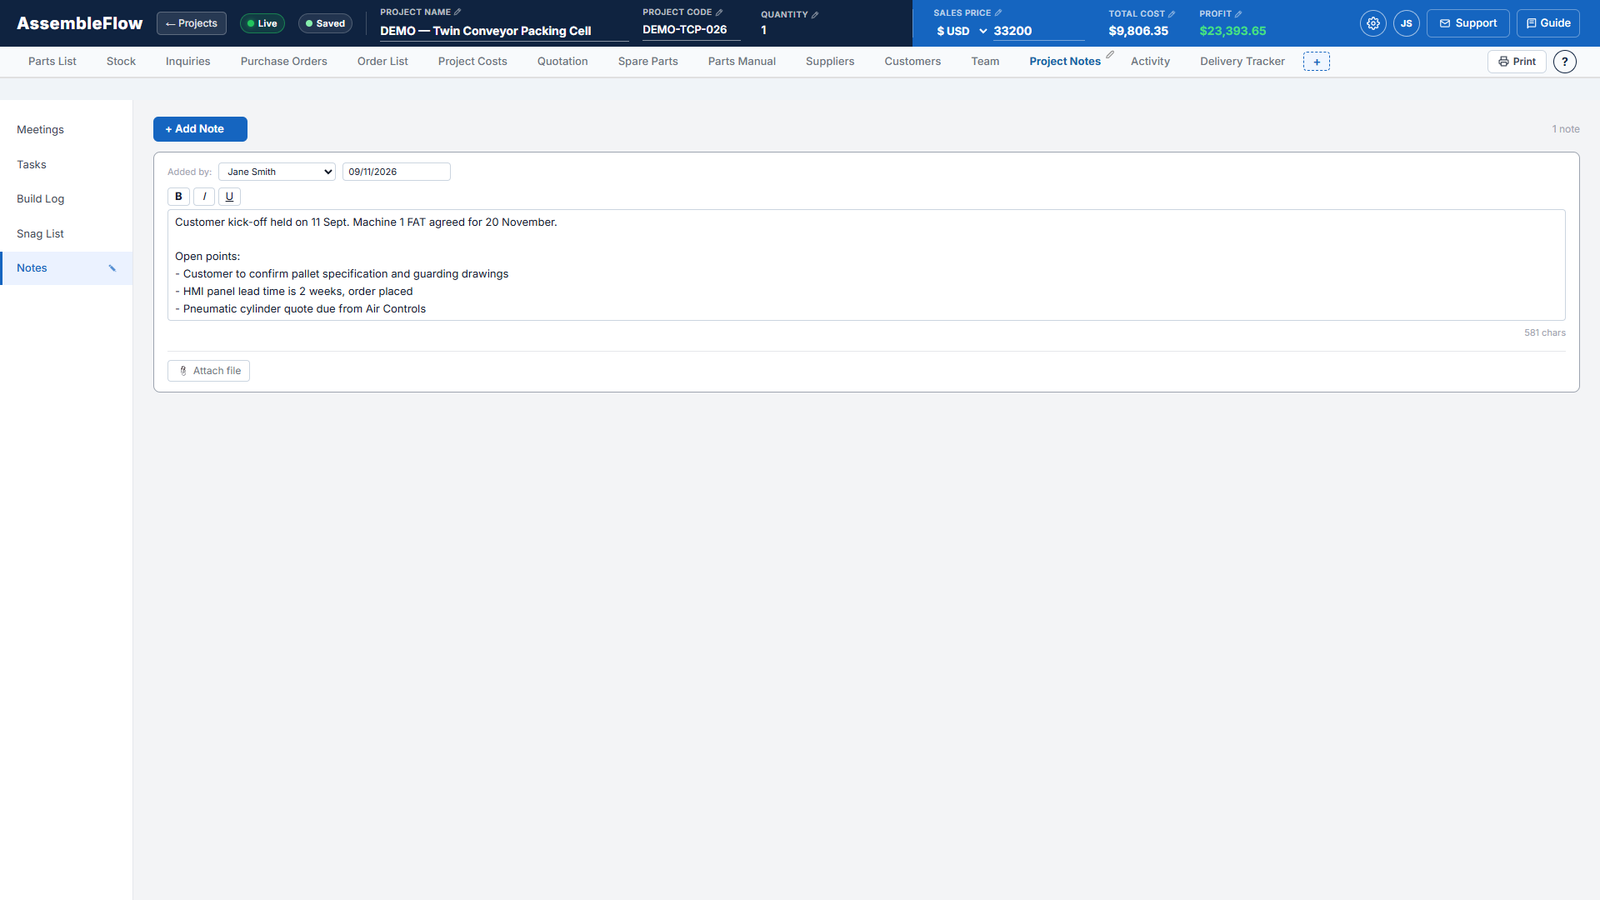
Screen 16: Project notes. Keep the project record in one place
Each project has a structured record in five sections: Meetings, Tasks, Build Log, Snag List and Notes. Write up meetings and actions, assign tasks, log progress on the build and track snags, and attach files to a note when you need to.
- Meeting actions can be sent to Tasks
- Assign tasks to your team
- Build log and snag list for the shop floor
- Attach files to notes
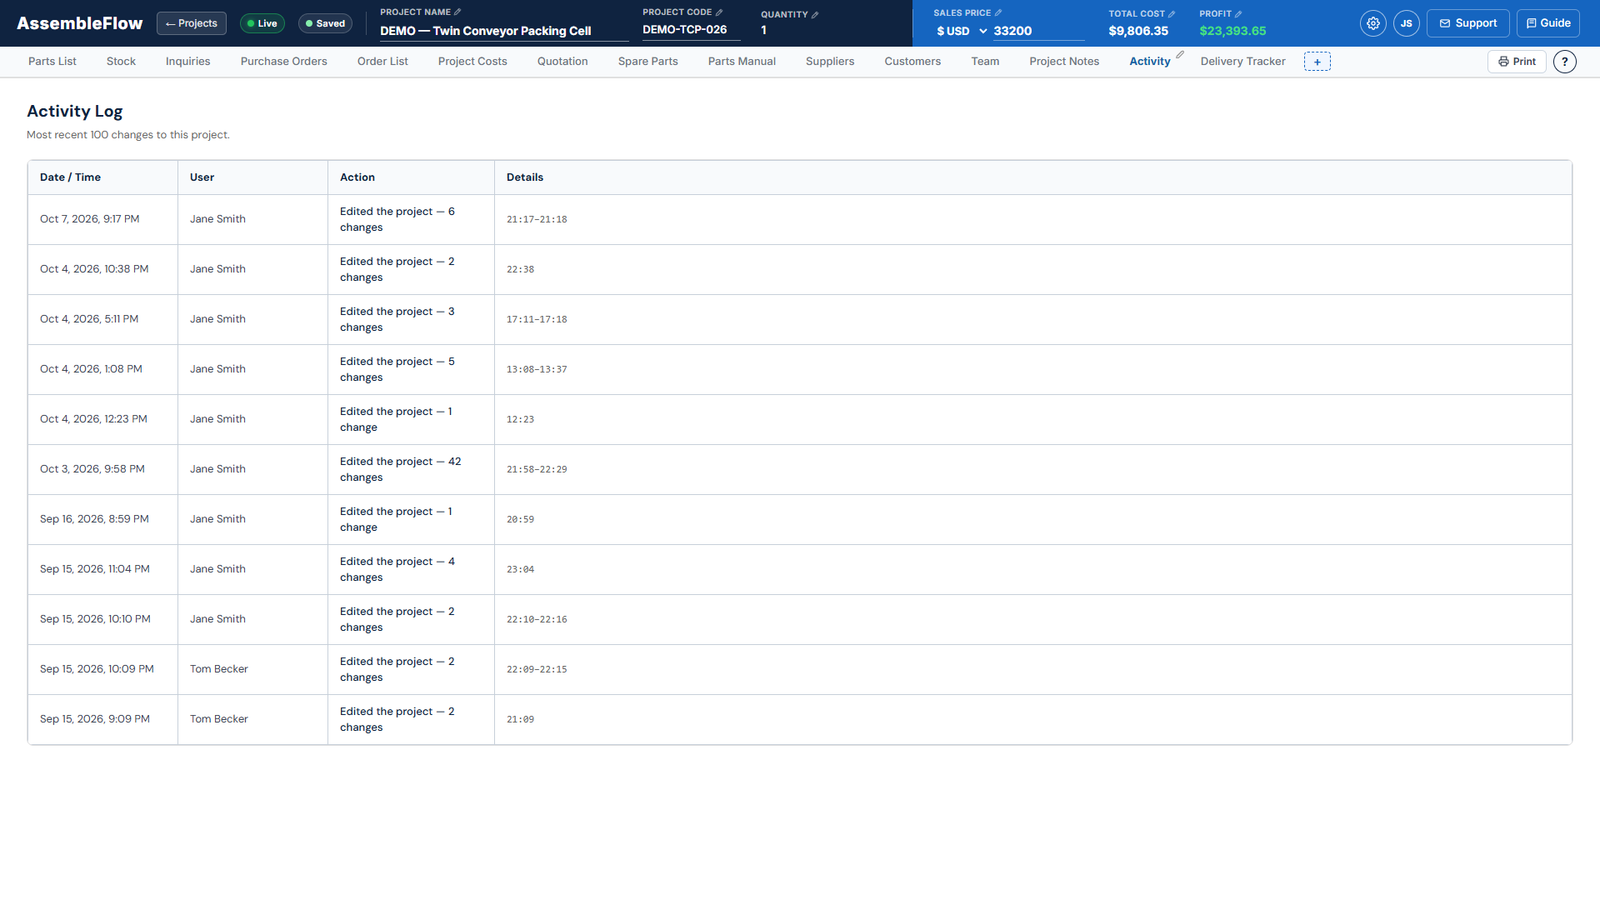
Screen 17: Activity. See who changed what, and when
Activity lists the latest 100 recorded changes to the project: who made them and when. It records meaningful events such as the project being created, renamed, edited or moved between Active, Completed and Archived. It is recorded by the system and cannot be edited.
- User and time for every recorded change
- Edits grouped per editing session
- Read-only audit trail
- Organization-wide list on the Overview screen
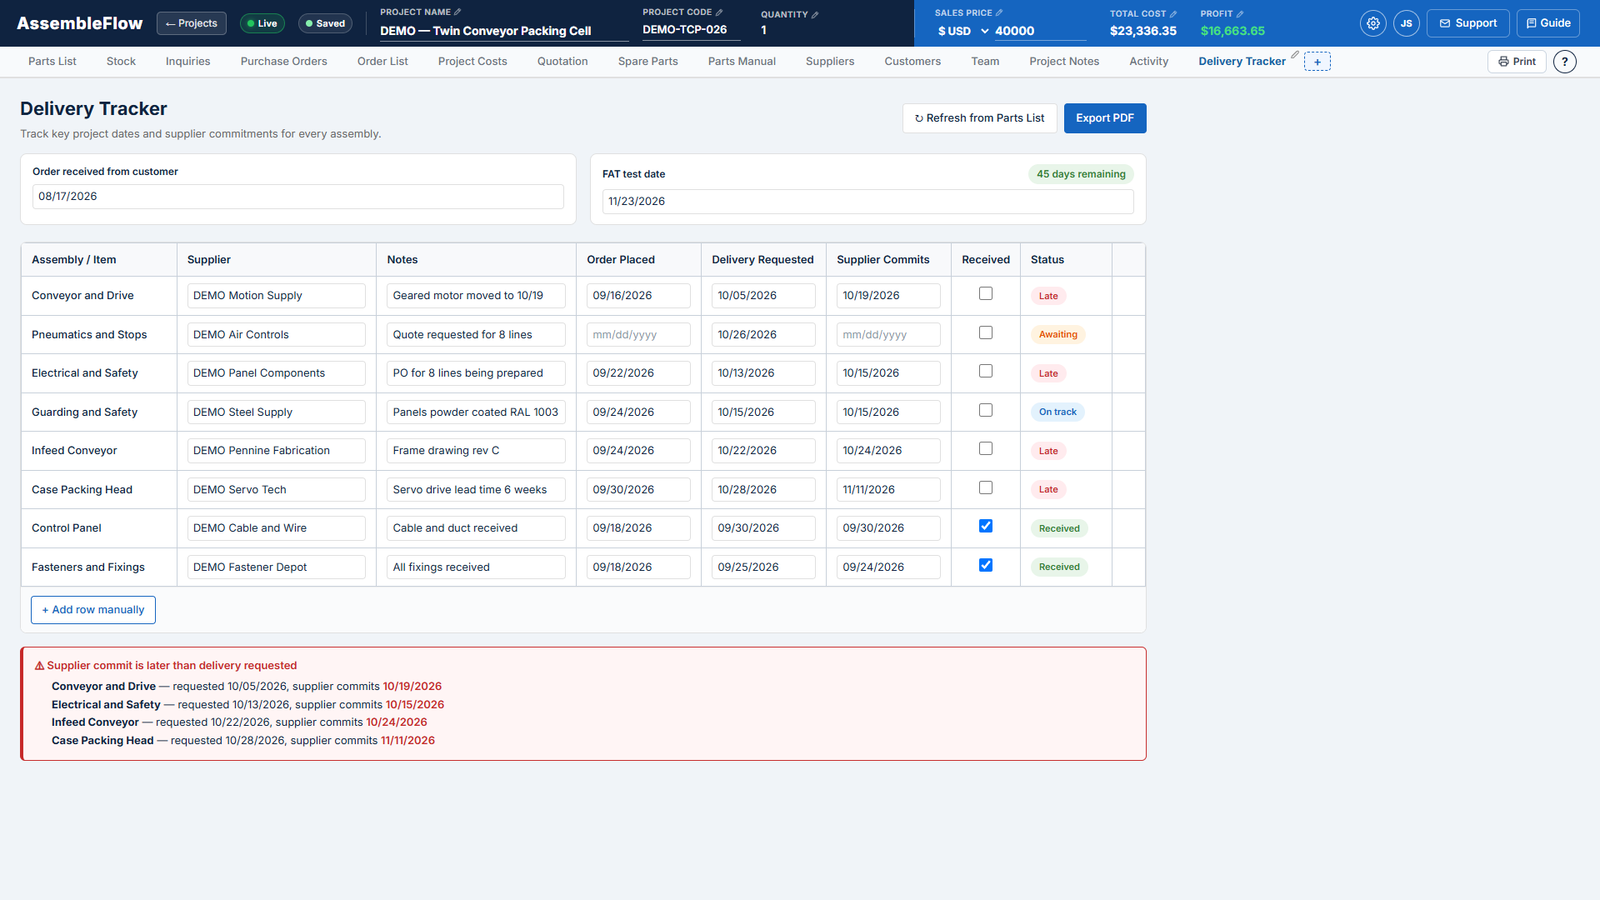
Screen 18: Delivery tracker. Track supplier deliveries
Follow supplier commitments for every assembly: when the order was placed, when you need it and when the supplier promises it. Set the customer order date and the FAT test date at the top for a countdown. Each row's status is worked out from its dates and whether the goods have been received.
- Order placed, delivery requested and supplier commits dates
- Tick Received when the goods arrive
- Refresh from the parts list, or add rows by hand
- Export PDF for the customer or the shop floor
No credit card required. See the pricing, download the free templates or try the margin calculator.